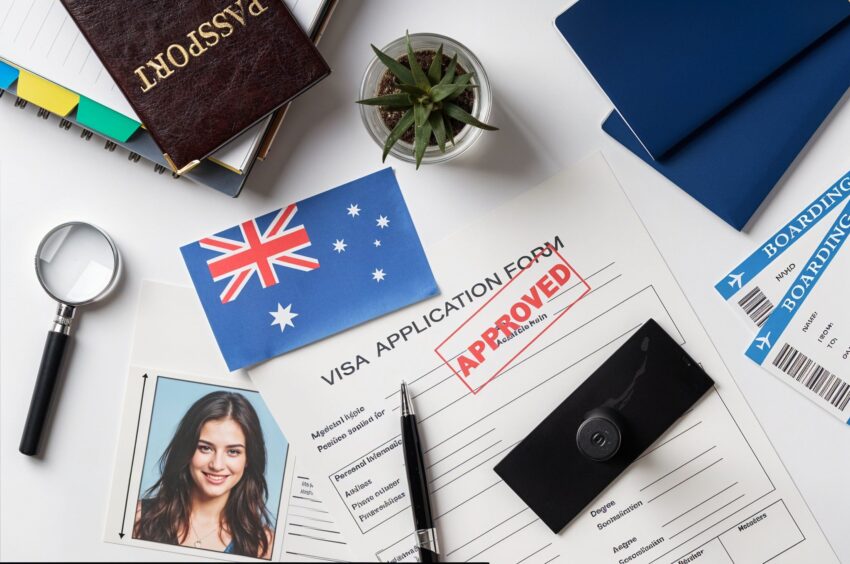
When applying for an Australian visa, one tiny detail can trip you up—your visa photo. It might seem simple enough to snap a quick picture, but the Australian government has some very specific rules to make sure your photo fits their standards perfectly. Imagine your visa photo as your official first impression. If it’s off, your application could be delayed or rejected. Not fun, right? So, let’s break down everything you need to know about Visa Photo Requirements for Australia—step by step, easy to understand, and with tips you can actually use.
What Are the Basic Australian Visa Photo Requirements?
Australia maintains very strict visa photo requirements to ensure that each applicant can be clearly and accurately identified. This precision helps immigration officers process applications smoothly and reduces the chance of identity-related issues. The photos you submit need to meet specific standards regarding size, background, and overall presentation. Even small deviations from these standards can lead to delays or rejections, so understanding these requirements is essential for anyone applying for an Australian visa.
The size of the photo is a crucial aspect, as it must be exactly 35 millimeters wide and 45 millimeters high, matching the standard passport photo dimensions. This uniformity allows the photo to fit perfectly into official documents and databases. Additionally, the background should be plain and light-colored, typically white or a light gray shade. The purpose of this simple background is to avoid distractions and ensure the face is the focal point of the image. Shadows, patterns, or textured backgrounds are not acceptable because they interfere with the clarity of the photo.
Your face needs to be fully visible and positioned correctly in the frame. This means the photo must show your full face from the front, centered within the frame, with your eyes open and clearly visible. It’s important that no hair covers your eyes or face, as any obstruction can complicate identification. When it comes to expression, a neutral look is mandatory: your mouth should be closed, and you shouldn’t smile or show your teeth. This neutral expression makes it easier for officials and biometric systems to verify your identity consistently.
Glasses and headwear have their own rules. You may wear clear glasses as long as there’s no glare obscuring your eyes, but tinted glasses or sunglasses are not permitted. Headwear is generally prohibited unless it is worn for religious or medical reasons, and even then, your entire face—from chin to forehead and side to side—must remain visible. These guidelines ensure that your photo meets the official standards and prevents any issues during your visa application process.
Why the Size of the Photo Is So Important
- The photo must be exactly 35 millimeters wide and 45 millimeters high, which is the standard size for Australian visa and passport photos.
- Think of the photo size like a ticket that has to fit perfectly into a specific slot; if it’s too big or too small, it simply won’t fit or be accepted.
- Many applicants make the mistake of cropping their photos incorrectly or resizing them without maintaining proper proportions, which leads to rejection.
- Submitting a photo that doesn’t meet the exact size requirements can cause delays in your visa application process.
- Immigration officials and biometric systems rely on uniform photo sizes to quickly and accurately verify your identity.
- Using a photo that matches these dimensions ensures your application moves smoothly without unnecessary complications.
- The background must be plain, with a light color such as white or light grey.
- A plain background ensures your face is the clear focus of the photo without any distractions.
- Busy, patterned, or dark backgrounds can interfere with facial recognition technology used by immigration officials.
- Shadows on the background or your face are not acceptable because they obscure important details.
- Lighting should be even and natural, avoiding harsh contrasts or reflections.
- A white or off-white wall works perfectly if you’re taking the photo yourself.
- Professional photo studios are often the best choice since they understand the specific background requirements for Australian visa photos.
Glasses, Hats, and Headwear Rules
| Item | Allowed or Not Allowed | Specific Conditions | Purpose/Reason | Common Mistakes to Avoid |
| Glasses | Allowed (with conditions) | Frames must not cover eyes; no glare on lenses | To ensure eyes are clearly visible | Wearing tinted or sunglasses; glare on lenses |
| Tinted Glasses | Not Allowed | N/A | Obscures eyes, making identification hard | Using sunglasses or tinted lenses |
| Hats/Headwear | Allowed only for religious or medical reasons | Must not cover any part of face; full face must be visible from chin to forehead and side to side | Respect for religious/medical needs while ensuring clear identification | Wearing hats that cover forehead or ears |
| Headscarves | Allowed under religious reasons | Face must be fully visible without shadows | Same as hats/headwear rules | Covering part of face or casting shadows |
| Other Accessories | Generally Not Allowed | Accessories that obscure face or hairline not permitted | To keep face fully visible for identification | Wearing large jewelry or face-covering accessories |
Clothing and Appearance Guidelines
While Australia does not enforce a strict dress code for visa photos, it’s important to choose your clothing and overall appearance carefully to ensure your photo meets the necessary standards. The main goal is to make sure your face is the clear focal point of the image, without distractions caused by your attire. Wearing simple, solid-colored clothing that contrasts with the background will help highlight your face effectively. Avoid wearing white or very light-colored tops that blend into the light background, as this can make the photo look washed out and reduce the overall clarity.
It’s also best to steer clear of uniforms, camouflage patterns, or any clothing that might be mistaken for official or military attire. Such outfits can cause confusion or raise unnecessary questions during the visa processing. Instead, opt for casual or formal wear that looks neat and professional without being overly flashy. The idea is to present yourself in a way that’s natural and easy to recognize, which helps immigration officials and biometric systems accurately match your photo with your identity.
Jewelry and accessories deserve special attention because they can easily obstruct parts of your face or create reflections that interfere with the photo’s quality. Avoid wearing large earrings, necklaces, or facial piercings that draw attention away from your facial features. Sunglasses or any tinted eyewear are strictly prohibited, as they hide your eyes, which are critical for identification purposes. If you wear glasses, ensure they are clear, free of glare, and that the frames do not cover your eyes.
Finally, your hairstyle should not obscure your face or eyes. Keep hair tidy and away from your forehead and eyes to provide a clear view of your facial features. Avoid extreme hairstyles or hair accessories that cast shadows or distract from your face. The aim is a clean, straightforward appearance that makes your photo a true and reliable representation of you, meeting the Australian visa photo standards without issues.
How to Take Your Visa Photo: DIY or Professional?
- You can choose to take your visa photo yourself at home or go to a professional photo studio; both options are accepted by Australian visa authorities.
- Taking the photo yourself is often more cost-effective since you won’t have to pay for professional services, and it’s convenient because you can do it anytime.
- However, when you take the photo at home, there’s a higher risk that it won’t meet the strict Australian visa specifications, such as size, lighting, or background requirements.
- DIY photos may lack the proper lighting, background uniformity, or precise cropping needed, which can lead to your application being delayed or rejected.
- On the other hand, professional photo studios guarantee that your visa photo will comply with all official requirements because they are familiar with the exact standards.
- Professional services usually provide properly sized, well-lit photos with plain backgrounds, minimizing the chance of errors or resubmissions.
- The downside is that professional photos can be costly compared to taking the photo yourself, and it might take more time to visit a studio and get the photos done.
- Another potential drawback is that studio hours might not always fit your schedule, especially if you need the photo quickly.
- If you are unsure about how to meet the specifications or want to avoid the risk of rejection, using a professional photo studio is a safer and more reliable choice.
- Remember, a high-quality photo is crucial for a smooth visa application, so weigh your options carefully before deciding between DIY or professional photos.
Digital Photo Submission for Australian Visa
| Requirement | Details | Why It Matters | Common Issues | Tips to Meet Requirement |
| Format | JPEG (.jpg) | Standard format accepted worldwide | Using unsupported file types like PNG or TIFF | Save or convert your photo as JPEG |
| File Size | Between 10KB and 5MB | Ensures file uploads smoothly and is clear | Too large files may fail to upload; too small may be blurry | Compress image without losing quality |
| Resolution | At least 600 x 750 pixels | Maintains clarity and facial detail | Low-resolution photos look pixelated or blurry | Use a good camera or scanner; check resolution before upload |
| Filters/Edits | No filters or excessive edits | Keeps photo natural for biometric checks | Using filters or heavy editing can distort facial features | Avoid apps that apply filters or change appearance |
| Natural Appearance | Clear, true-to-life colors | Helps immigration officials recognize you | Photos with altered colors or lighting can cause rejection | Use natural lighting and avoid color adjustments |
How to Check If Your Visa Photo Meets Australian Standards
Before submitting your visa photo, it’s essential to carefully review it against the Australian government’s strict requirements. The most critical factor is the exact size of the photo—it must measure precisely 35 millimeters wide by 45 millimeters high. Photos that are even slightly larger or smaller risk being rejected, as this size standard ensures the photo fits perfectly within official documents and biometric systems. Checking the size with a ruler or digital tool before submission can save you from costly delays.
Your face should be the clear and central focus of the photo. Make sure your entire face is visible and perfectly centered in the frame. Any tilt, angle, or cropping that cuts off parts of your head or chin is unacceptable. The background also plays a significant role; it must be plain, light-colored, and free from any patterns or shadows. A clean, distraction-free background makes it easier for officials to clearly identify your facial features.
Another important aspect is your expression and visibility. Your eyes must be fully open, clearly visible, and free from glare caused by glasses or lighting. Avoid wearing tinted glasses or sunglasses altogether. Additionally, you should maintain a neutral expression—no smiling, showing teeth, or exaggerated facial expressions. A neutral face helps ensure consistency in identity verification and biometric recognition.
Lastly, the photo must be recent, taken within the last six months, so it accurately reflects your current appearance. The image should also be crisp and sharp, without any blurriness or pixelation that might obscure your features. If you can confidently answer yes to all these points, then your visa photo meets the Australian standards and is ready for submission without worry. Taking the time to carefully check each detail can make a big difference in avoiding delays or rejections in your visa application process.
Step-by-Step Guide to Taking the Perfect Visa Photo at Home
- Start by finding a plain background that is either white or a very light color to ensure your face stands out clearly.
- Make sure to use natural daylight when taking your photo, avoiding any shadows on your face or the background to keep the image clean and clear.
- Position yourself about one meter away from the background to prevent shadows and allow the camera to focus properly on your face.
- Hold the camera or smartphone at exactly eye level to capture a straight, front-facing image of your face.
- Look directly into the camera lens with a neutral expression—no smiling or showing teeth—to meet visa requirements.
- Take multiple photos from the same position so you can choose the clearest and best-looking one without any issues like blinking or movement.
- Use reliable photo editing software or online tools to crop and resize your chosen photo precisely to 35 millimeters wide by 45 millimeters high.
- Before submitting, carefully double-check that your photo meets all official requirements, including size, background, lighting, and facial expression, to avoid any delays or rejections in your visa application.