Preparing your face for an official photo shoot isn’t just about looking good — it’s about showcasing your best self with confidence and ease. Whether it’s for a passport, a corporate headshot, or a professional profile, getting your face camera-ready can feel like a mini art project. But don’t worry, I’m here to guide you step-by-step through a simple, practical routine that will leave you glowing and ready to own that photo session. Let’s dive in!
Why Preparing Your Face for an Official Photo Shoot Matters
Preparing your face for an official photo shoot goes far beyond simple vanity — it’s about presenting the best, most polished version of yourself in an image that may be seen repeatedly for years. Whether it’s a corporate headshot, a passport photo, or a professional portfolio, that single frame captures more than just your appearance; it reflects your personality, energy, and how you want the world to perceive you. In professional environments, your photo can even influence first impressions before any face-to-face interaction happens. That’s why investing a little extra time in facial preparation is not just smart, it’s essential.
A well-prepped face interacts more favorably with lighting, one of the most important elements in photography. Clean, hydrated, and balanced skin reflects light evenly, giving your face a natural, healthy glow rather than looking oily or dull. On the other hand, unprepared skin—whether dry, shiny, or irritated—can exaggerate flaws under strong lighting and camera lenses. Cameras are high-definition truth-tellers, and even the slightest imperfections like patchy skin, flaky areas, or uneven tones tend to be amplified in a photo. Prepping your skin can help soften these issues and create a smoother, more balanced appearance.
Beyond lighting and aesthetics, proper preparation also helps with your facial expressions. When your skin feels clean and comfortable, you’re less likely to squint, frown, or appear tense in your photos. People often underestimate how much discomfort or self-consciousness about blemishes or dry skin can affect their confidence — and confidence is everything in a photo. A face that feels fresh and well-cared-for tends to naturally look relaxed and expressive, projecting more energy and personality.
Lastly, preparing your face sends a signal to both yourself and others that you take the moment seriously. It puts you in the right mindset to be present and perform. Just like an athlete warms up before a big game, a little self-care before your shoot can sharpen your focus and boost your emotional readiness. Your face, when carefully prepped, becomes your best asset. It allows your true self to shine through, unburdened by distractions or self-doubt, and helps create a photo that not only looks great but feels authentic.
The Day Before – Start Early to Win the Photo Game
| Action | Why It Matters | How to Do It | Benefits | Common Mistakes to Avoid |
| Hydrate Like Your Face Depends on It | Water flushes out toxins and plumps skin from inside out | Drink at least 8 glasses of water throughout the day | Skin looks fuller, smoother, and more radiant | Skipping water or drinking too much caffeine/alcohol, which dehydrates skin |
| Sleep Well – Beauty Sleep Isn’t a Myth | Proper sleep reduces puffiness and dark circles around eyes | Aim for 7-8 hours of uninterrupted sleep | Brighter, fresher complexion and reduced tiredness signs | Staying up late or poor quality sleep, leading to dull skin and eye bags |
| Skip New Skincare Products | New products can irritate or cause unexpected breakouts | Stick to your regular skincare routine only | Avoids redness, dryness, or allergic reactions that affect photo quality | Experimenting with new products, masks, or treatments before shoot day |
| Prepare Mentally | Being calm helps your face relax and look natural | Take some time to relax, meditate, or do light stretching | Reduced facial tension, more natural expressions in photos | Stressing or rushing, leading to tense muscles and forced smiles |
| Eat Skin-Friendly Foods | Nutrition supports healthy skin appearance | Focus on fruits, veggies, and foods rich in antioxidants | Skin looks clearer and more vibrant on shoot day | Eating greasy or junk foods that may cause breakouts or dull skin |
The Morning Of – Getting Your Face Photo-Ready
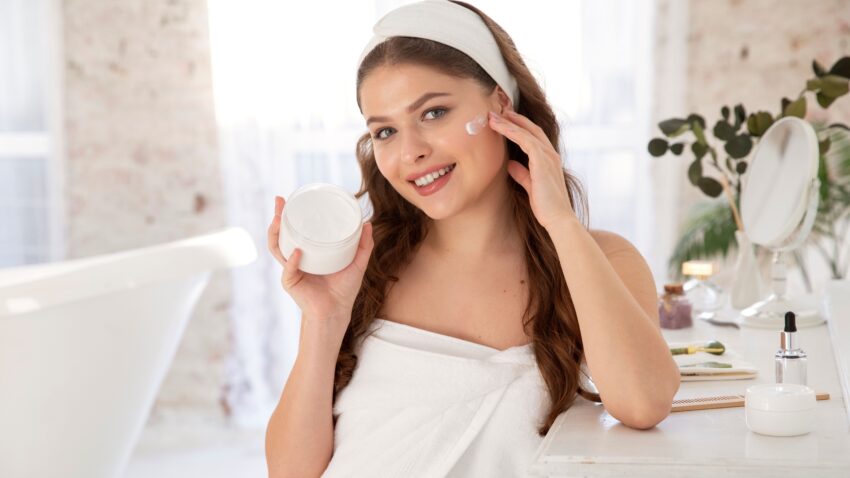
- Begin by washing your face with a gentle cleanser designed for your skin type. This step is crucial to remove any dirt, excess oil, and impurities that have built up overnight without stripping your skin of its natural moisture. A clean face provides a fresh canvas and helps subsequent skincare products absorb better, ensuring your skin looks clear and radiant in photos.
- Next, exfoliate your skin lightly to slough away dead skin cells that can cause a dull or flaky appearance. It’s important to be gentle here — think of exfoliation as softly brushing away rough patches rather than aggressively scrubbing. Over-exfoliating can lead to redness, irritation, and uneven texture, which the camera tends to highlight. A smooth skin surface reflects light evenly and improves the overall look of your complexion.
- After exfoliation, apply a moisturizer suited to your skin type. This step locks in hydration, plumps the skin, and creates a silky, even surface that helps prevent dryness or tightness throughout the day. Well-moisturized skin naturally glows and provides an excellent base if you choose to wear makeup. Even if you prefer to go makeup-free, moisturizer will help your face appear supple and healthy under camera lighting.
- Finish your morning face prep by applying sunscreen, even if your photo shoot is indoors or the day is cloudy. UV rays can penetrate windows and cause subtle skin damage or redness that shows up on camera. Using a broad-spectrum sunscreen protects your skin from these invisible rays, reduces the risk of blotchiness, and keeps your skin tone consistent. Additionally, sunscreen can help maintain your skin’s youthful appearance over time, making it an essential daily step.
Tackling Shine and Redness Before the Shoot
Dealing with shine and redness is one of the trickiest parts of preparing your face for an official photo shoot. The camera tends to pick up every little detail, and oily shine can create unwanted glare, making your skin appear greasy rather than fresh. This is especially common for people with naturally oily skin or those who tend to get shiny as the day progresses. To combat this, using a mattifying primer or a light dusting of translucent powder can work wonders. These products help absorb excess oil and reduce shine without flattening your complexion or making your skin look dry and lifeless. The key is to apply just a thin, even layer, focusing on the areas that tend to get the most oily, like the forehead, nose, and chin, often called the T-zone.
Redness is another common concern that can throw off the balance of your skin tone in photos. It might come from sensitivity, irritation, or natural flushing, and it often appears around the nose, cheeks, or chin. Thankfully, there’s a handy trick that professional makeup artists use: a green-tinted corrector. Green is opposite red on the color wheel, so applying a small amount of green corrector before your foundation or concealer helps neutralize and tone down redness. When blended carefully, this technique evens out your skin tone, giving you a smoother and more uniform look that the camera will appreciate.
It’s important to remember that both mattifying products and color correctors should be used sparingly. Overusing them can make your skin appear cakey or unnatural under the camera flash. The goal is to enhance your natural skin, not mask it. So, gentle application and blending are crucial to maintain a fresh and polished appearance. If you’re new to these products, practicing a few days before your shoot can help you find the right balance without stressing on the day itself.
Lastly, keep in mind that good lighting and proper skincare throughout the days leading to the shoot also play a major role in controlling shine and redness. Hydrated, calm skin is less likely to overproduce oil or flare up with redness. So, these makeup tricks are your last step, perfecting what you’ve already built with consistent skin care and preparation. When combined, these efforts help ensure that your face looks smooth, radiant, and perfectly balanced just as the camera clicks.
Makeup Tips for an Official Photo Shoot
| Makeup Tip | Description | Why It Matters | Application Advice | Common Mistakes to Avoid |
| Keep It Natural and Light | Aim for a look that enhances your features without looking heavy or cakey. | Natural makeup ensures you look fresh and polished rather than overdone or artificial. | Use lightweight foundation or tinted moisturizer; focus on enhancing your natural skin tone. | Applying too much foundation or heavy contouring that looks unnatural on camera. |
| Conceal Problem Areas | Use concealer to hide blemishes, dark circles, and uneven patches. | Concealing imperfections helps create a smooth and even complexion in photos. | Choose a concealer shade close to your skin tone and blend thoroughly with a brush or sponge. | Using concealer that’s too light or too thick, causing obvious patches or cakiness. |
| Define Your Brows | Fill in sparse areas with a brow pencil or powder to shape and frame your face. | Well-defined brows help balance your facial features and add structure to the photo. | Use light, feathery strokes for a natural look; avoid harsh lines or overly dark brows. | Overfilling brows or using colors that don’t match your natural hair color. |
| Subtle Lip Color | Apply a soft, neutral shade like nude or light pink to add life without distraction. | A natural lip color complements the face and maintains focus on your expression. | Opt for matte or satin finishes to avoid shine that can reflect flash. | Using bold or glossy lip colors that draw too much attention or reflect light oddly. |
| Avoid Heavy Shimmer | Steer clear of glittery or highly reflective makeup products. | Shimmer and glitter can cause harsh light reflections and odd spots in photos. | Use matte or satin-finish eyeshadows and highlighters with a subtle glow. | Applying too much shimmer on the eyelids or cheekbones that looks unnatural under flash. |
Hair and Face Combo – Why It Matters
- Clean, well-styled hair is essential because it frames your face and adds an overall polished look. When your hair is neat and tidy, it complements your facial features instead of distracting from them. A fresh hairstyle also boosts your confidence, which translates well in photos.
- Avoid using overly shiny hair products before your shoot. While a bit of shine can make your hair look healthy, too much shine can cause glare under bright lights or camera flashes, creating unwanted reflections that draw attention away from your face.
- Taming flyaways is important because stray hairs floating around your face can disrupt the clean lines and balance of your look. Flyaways can also create a messy appearance and distract from your expression, so using a light hairspray or smoothing serum helps keep everything in place.
- Keeping hair off your face ensures that your facial features stand out clearly in the photo. Hair falling across your forehead or cheeks can cast shadows, cover important features, or create uneven lighting on your skin. Pulling your hair back slightly or styling it away from your face helps the camera capture your true look.
- Consider the overall harmony between your hairstyle and your outfit. A hairstyle that matches the tone of your shoot—whether professional, casual, or creative—will enhance your appearance and give the photo a cohesive feel.
- Don’t forget about the hairline and neck area. These are often overlooked but can impact how neat and well-groomed you appear. Clean edges and a tidy neckline contribute to an overall sharp look.
- If you have facial hair, trim or groom it carefully. Well-maintained facial hair adds definition to your face, but uneven or unkempt hair can distract from your natural features and reduce the photo’s professionalism.
- Finally, test your hairstyle with similar lighting to your shoot if possible. This helps you see how your hair interacts with light and lets you make adjustments before the big day.